
Essential property preparation steps for successful cesspool installation in Suffolk County, covering permits, site evaluation, and compliance requirements.

Here’s where things get interesting: Suffolk County flipped the script on July 1, 2019, banning old-school cesspool-to-cesspool replacements. The game changed dramatically—new installations now require advanced systems that slash nitrogen in residential wastewater by an impressive 70%. Fast forward to 2025, and the standards mandate Innovative and Alternative Onsite Wastewater Treatment Systems (I/A OWTS) that reduce total nitrogen in treated effluent to just 19 mg/l.
But this isn’t just another box to check on some bureaucrat’s clipboard. These requirements are protecting something pretty critical—Long Island’s sole-source aquifer that millions of people rely on for clean drinking water every single day. Suffolk County rolled out these regulations to tackle a real problem: nitrogen seeping into ground and surface water, triggering harmful algae blooms, creating dead zones, and driving up drinking water treatment costs across the region.
Getting a handle on these requirements right from the start? That’s your insurance policy against the nightmare scenario of planning for outdated systems that’ll get rejected faster than a bad reality TV audition.
The legislation puts permits front and center for system replacements, requiring registration of your shiny new system with the Department of Health Services. Homeowners need to snag a permit from Suffolk County before replacing or retrofitting a cesspool—though interestingly, the permit cost remains TBD at this point.
Here’s the golden rule: don’t procrastinate on this one. Skipping the permit check before installation is like playing financial Russian roulette—you’re looking at hefty fines and frustrating delays that’ll make you want to pull your hair out. The permit process involves submitting detailed site plans, soil percolation test results, and system specifications that tick every box on current environmental standards.
We follow Suffolk and Nassau County codes like a roadmap for proper cesspool placement and construction, snagging all required permits and scheduling inspections to keep your installation cruising along smoothly and staying compliant. When you partner with experienced contractors who eat, sleep, and breathe permitting, confusion vanishes and nothing slips through the cracks.
Our installation team becomes your backstage coordinators, working hand-in-hand with local health departments to schedule those all-important inspections at excavation, tank placement, and backfill stages. We maintain current permits and certifications required for cesspool construction throughout Long Island municipalities—it’s all part of our systematic approach that prevents work stoppages and keeps momentum building.
The permit process also plays referee on your system’s placement. Suffolk County draws hard lines: minimum setbacks of 100 feet from water wells and 20 feet from property lines for new cesspool installations. These aren’t arbitrary numbers—they’re strategic distances that protect your water supply, keep the peace with neighbors, and make sure you’re environmentally responsible.
The installation adventure kicks off with soil percolation testing—think of it as your soil’s personality test that determines proper system sizing and placement. We’re talking precise excavation that dances around utility lines, plus installation of distribution systems that maximize treatment area while respecting those vital setback requirements. Soil percolation testing reveals absorption rates that shape your system’s entire design blueprint.
Your soil conditions are the ultimate wild card that impacts both system design and your bottom line. Sandy soils typical in coastal areas demand larger distribution systems to prevent groundwater from rushing through too quickly, while clay soils need clever modified designs that keep your system from backing up when Mother Nature decides to get extra wet.
Professional soil evaluation is like having X-ray vision—it spots potential complications before the excavator even fires up. Soil conditions, drainage patterns, and utility locations create a puzzle that affects placement options, demanding thorough site evaluations to identify sweet spots that satisfy regulatory requirements while keeping installation costs reasonable and future maintenance accessible.
The soil type where your cesspool will live determines the size and type of system you need—this is why consulting with a professional isn’t optional, it’s essential. Install a cesspool that’s too small, and you’re signing up for frequent overflows and wallet-draining repairs. This upfront investment in proper evaluation? It’s your insurance against expensive nightmares lurking down the road.
Testing also uncovers if your property needs special treatment. Excavation, soil testing, and permits can add $1,500-$4,000 to your project tab, and properties with rocky terrain, slopes, or strict regulations should brace for higher bills. Discovering these factors early means accurate budgeting and realistic timeline planning—no surprises, just solid preparation.
Want live answers?
Connect with a AAA Dependable Cesspool expert for fast, friendly support.
Site preparation is where theory meets dirt—literally. You’re excavating while keeping local regulations happy, then rolling into cesspool installation where the new system takes shape, pipes get laid, and the holding tank comes together. This phase involves grading the land, carving trenches for the septic tank and drainage field, and making sure of proper site preparation. Prices fluctuate based on soil conditions, site access, and how complex the excavation gets.
Smart access planning is your secret weapon against delays and budget bloat. Professional assessment means evaluating soil conditions and property layout, locking down required local permits for total compliance with environmental and zoning standards, marking the installation zone, and excavating to the perfect depth and slope for drainage that works.
Your property’s layout is the stage that determines how effectively this show runs. Large excavation equipment needs clear pathways to reach the installation site—think of it like clearing a runway for landing. Obstacles like mature landscaping, fencing, or structures might need modification or some seriously careful navigation to make everything work.

The installation process demands precision excavation that treats utility lines like they’re made of glass, while installing distribution systems that maximize treatment area and respect those non-negotiable setback requirements from wells and property lines. Before a single shovel breaks ground, every underground utility must be located and marked—because nobody wants to star in a disaster movie featuring severed gas lines or electrical cables.
Make this your first move: dial 811 (Dig Safe) at least 48-72 hours before installation day. This free service is basically treasure mapping for your property, marking underground utilities including gas lines, electrical cables, water mains, and telecommunication lines. The excavation phase where your cesspool will live should be handled with surgical precision—and always with professional help steering the ship.
We take utility detection to the next level beyond standard marking. Here’s why: older properties are like archaeological sites with undocumented utility lines or abandoned systems that standard marking services might completely miss. This thorough approach is your shield against project delays and eye-watering utility repair bills.
Assessment includes locking down required local permits for environmental and zoning compliance, marking the installation area, excavating to proper depth and slope for effective drainage, and clearing debris to build a rock-solid foundation. Proper site clearing and debris removal aren’t just housekeeping—they create safe working conditions and guarantee accurate system placement.
Safety goes way beyond just locating utilities. Excavation sites need proper shoring and safety barriers, especially when dealing with unstable soil that could shift unexpectedly. Some older and particularly site-built cesspools are basically collapse disasters waiting to happen, making professional safety protocols absolutely essential from start to finish.
Most residential cesspool installations wrap up in a swift 2-3 days from first dig to final backfill—though complex installations wrestling with challenging soil conditions or supersized systems might need extra time in the ring. Understanding the installation timeline helps you prepare for temporary disruptions and keeps your expectations realistic.
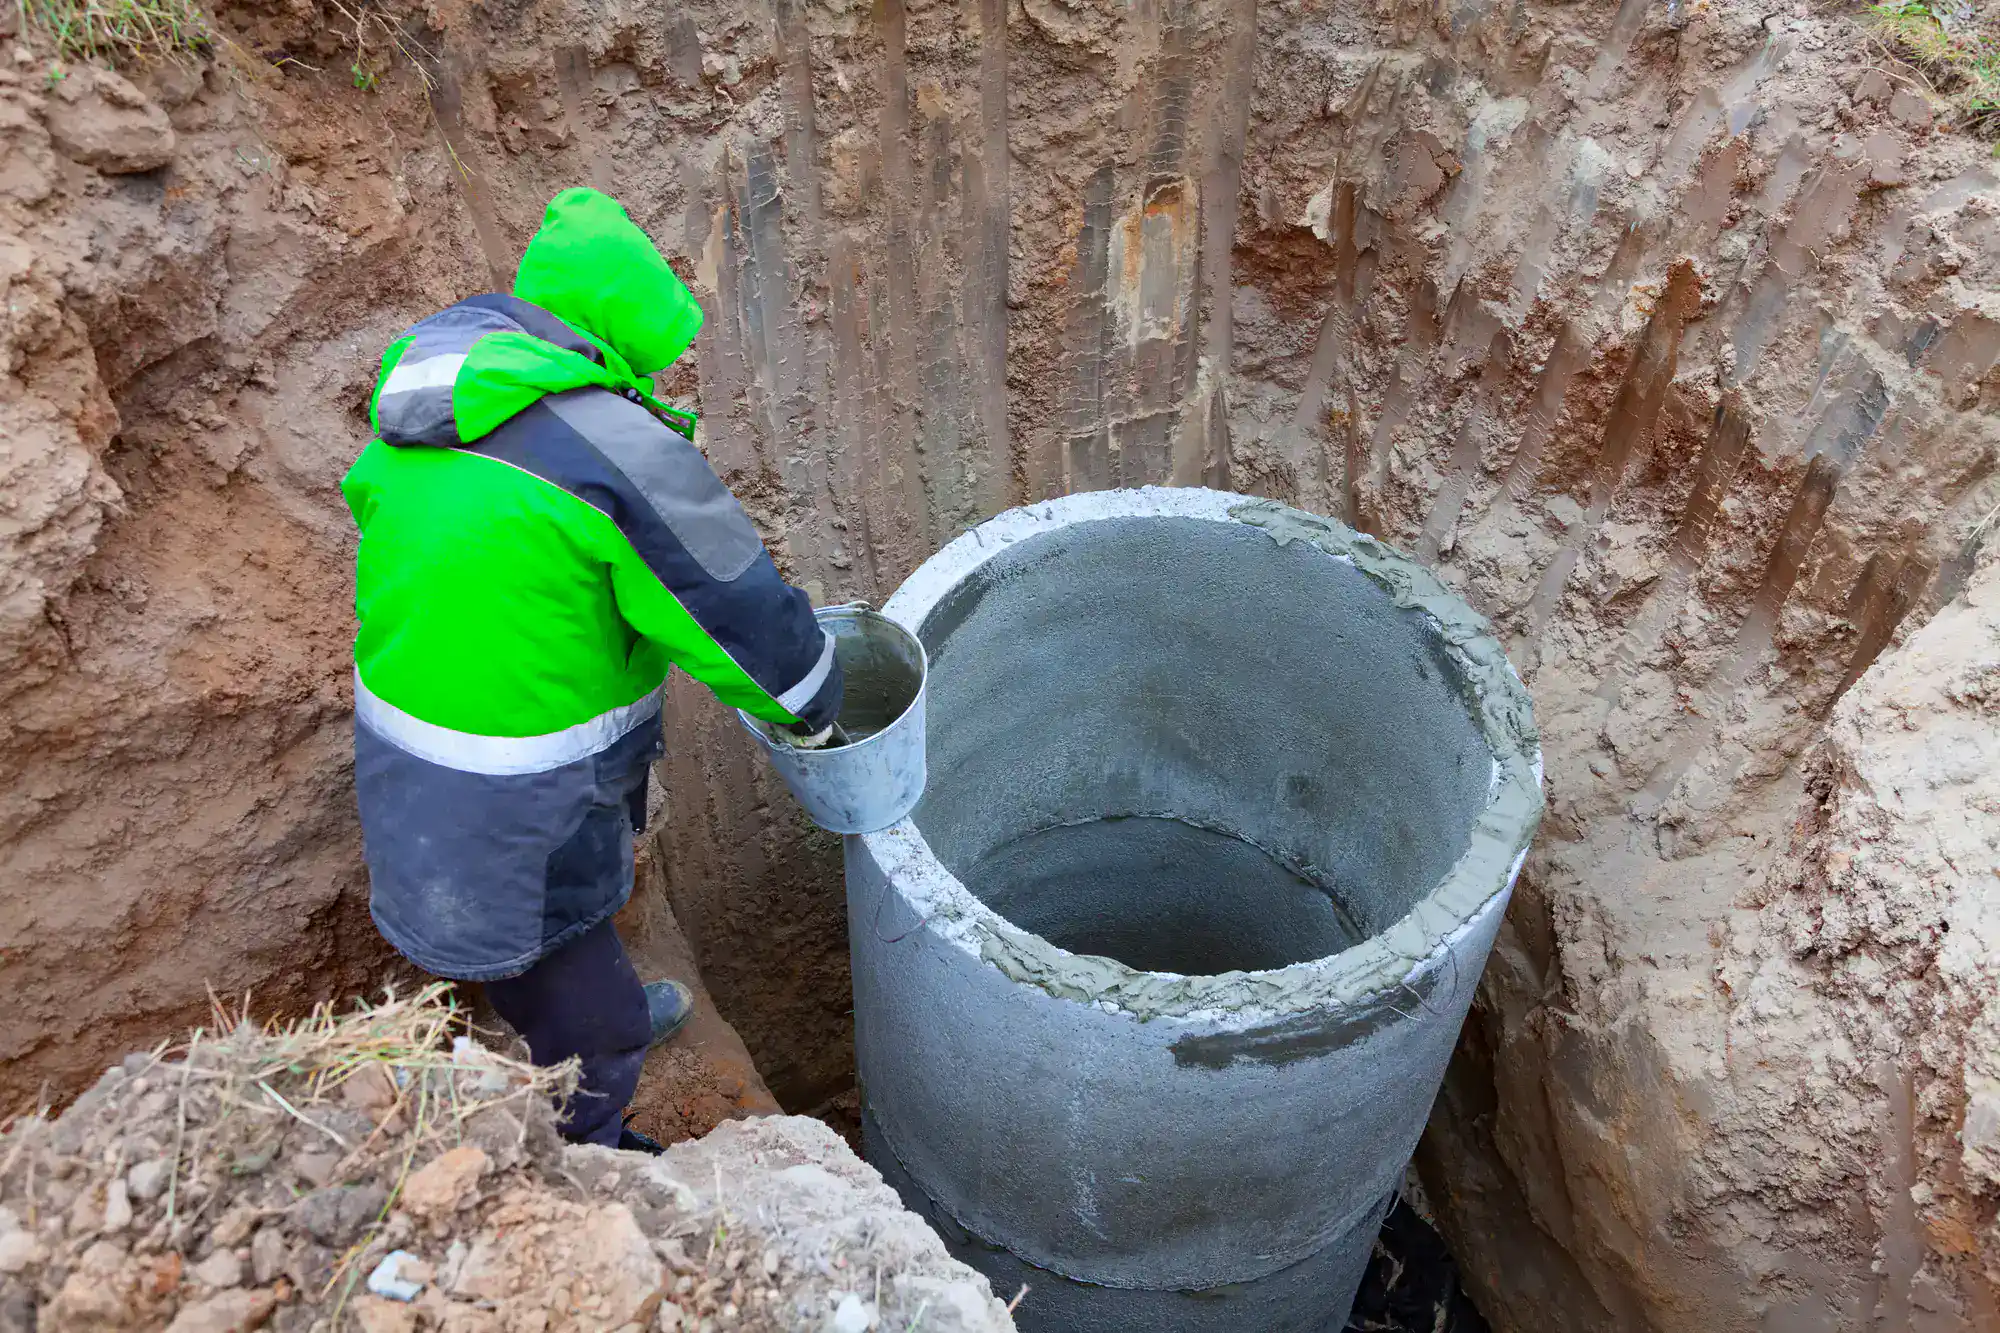
The installation sequence follows a carefully choreographed pattern for the best results. Professional installation gently lowers the cesspool tank into excavation with the precision of a watchmaker, guaranteeing perfect alignment of inlet and outlet pipes. Then comes the backfill ballet—soil gets packed evenly around the tank with gentle compacting to prevent any shifting or settling. Before calling it done, we check every pipe connection for leaks and verify drainage performance is hitting all the right notes.
Once site prep wraps, the cesspool and all its associated plumbing and drainage pipes take their positions. Gravel often gets packed around drainpipes to provide stability and support. When installation reaches the finish line, the excavated area gets filled back in and the entire septic system undergoes thorough inspection before it officially goes live. This systematic approach guarantees your system functions flawlessly from day one.
Weather plays director sometimes, particularly during wet seasons when soil conditions get moody. Once the cesspool connects to the sewer system, excavation gets backfilled with soil using careful technique to make sure the cesspool has proper support. We keep a close eye on weather forecasts and adjust schedules to verify the best installation conditions.
After the cesspool is installed and hooked up to the sewer system, a final inspection conducted by a professional who knows the installation process inside and out validates everything—confirming the cesspool is properly installed and functioning like a dream. This final step stamps your investment with approval and confirms your system is ready to perform.
Planning for temporary inconveniences helps minimize chaos in your daily routine. During installation, you’ll have limited or no wastewater service, so you might need to arrange alternative facilities for the short term. A little planning here goes a long way toward keeping life running smoothly.
Proper preparation is the bedrock—literally and figuratively—of a successful cesspool installation that checks every box on Suffolk County’s environmental standards while protecting your investment. From mastering permit requirements to strategically planning site access and thoroughly clearing your property while marking every utility line, each step prevents costly delays and makes sure you’re sailing smoothly through current regulations.
Hidden costs, project delays, or property damage? Those worries evaporate when you team up with experienced contractors who see these potential pitfalls coming from a mile away. The secret ingredient is partnering with professionals who navigate these complexities every single day and keep your project charging forward.
When you’re ready to transform your property with a cesspool installation that’s done right, we at AAA Dependable Cesspool Sewer & Drain bring over 25 years of Suffolk County experience to your doorstep. Our team handles the entire journey from permits to final inspection, guaranteeing your installation meets all current standards while delivering the reliability your property deserves. Let’s make this happen—the exciting, stress-free way.
Summary:
Article details:
Share:


